The Bridge (and first trash pack)
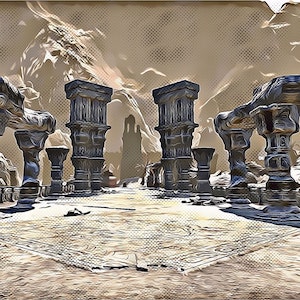
After crossing the bridge you will be met with multiple waves of smaller enemies. None of these are significant but there are a lot of them to deal with before moving on.
Typically, the group stacks at the start of the bridge, mounts up and tries to move as one unit all the way to the last pillar on your left where you can line of sight the enemies. You can choose to handle these wave by wave, however, having your tank group them up and your DPS burn them down if you want.
The advantage of running behind the pillar is that the melee mobs will end up stacking themselves on the group so everyone knows where to drop their damage and heals. You will have enemies on both sides of the pillar (facing back towards the bridge) so your tank/s should be pulling in the archers. This method is usually quicker but if someone gets left behind and focussed they may struggle to survive.
Outside the Gates
- Destroyers - Melee enemies with two-handed weapons that carry banners (indicating that they are "elite" enemies). They do fair damage, which can cleave, and have a frontal cone attack which knocks group members down.
- Flame-Shapers - Ranged, bannered enemies equipped with an inferno staff. These will perform an interruptible channeled attack which shoots fireballs at multiple members of the group.
- War Priests - Barely notable but the last of the bannered enemies here. They are melee enemies with a snare and knockdown ability but do little damage.
Your tank/s need to taunt and turn the Destroyers and War Priests away from the group. None of the bannered enemies can be pulled but all of the important enemies in the first pack are melee so can be easily grouped and managed. The second wave is a group of five Flame-Shapers who should be interrupted as a priority, the tank will have plenty to deal with here so the group should spread themselves among the enemies and be ready to interrupt.
Tip: If your tank/s taunt the Flame-Shapers and run along the wall left of the gate there is a hole in the floor that can be used to line of sight the enemies. While the tank is doing this, other group members will need to make sure the enemies are interrupted but they will all move into a nice stack if done correctly.
Boss One - Ra Kotu
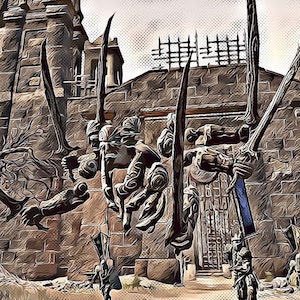
A huge air atronach that spawns in with three additional enemies and is typically pulled immediately.
His notable attacks are as follows:
- Gusts of wind - Small red AoEs that will lock on to and follow a single group member. The circle does a small amount of damage to anyone inside and can quickly switch targets. A single group member can get targeted by multiple gusts at a time.
- Heavy Attack - Indicated by the usual "yellow sparks" the boss wraps his arms around his body and unleashes a powerful attack on whoever has aggro.
- Six Sword Assault - The boss throws out four large AoEs in diagonal directions (his "corners") that return the same way and deal damage to anyone in their path.
- Sword Swirl - At 35% (and at regular intervals thereafter if the fight goes on for a while) the boss will form a large AoE around him and continuously spin with his swords dealing large amounts of damage to any group member caught inside.
After defeating Ra Kotu the gate he came out of will be accessible. When six group members go inside the gate will close and the other six are locked out. To the right is another door that will now be open and the remaining group members can proceed through here. You may wish to organise your group before proceeding.
When the fight starts the tank needs to taunt and turn the boss away from the group and be ready to block the heavy attack. The group can spread out a little from each other to avoid stacking multiple gusts in one place (just a few steps, not so far away that your healers can't reach you). If you have enough ranged DPS then you can position yourselves more directly behind the boss rather than to the left or right to avoid additional damage from the Six Sword Assault. All of this damage can be healed through but stacking multiple effects can make it unnecessarily stressful.
The mechanic that causes issues is the Sword Swirl at 35%. When the boss is approaching this health percentage take a few steps back to ensure you do not get hit by it. Most tanks will be able to block and heal/be healed through the damage (if not, you can kite the boss around during this attack) but other group members will not survive many hits from this. Once this attack has started it will repeat at regular intervals until the boss is dead. Try to maintain enough distance to ensure you are not going to get caught by the next one (the boss' hit box is huge so you can melee attack outside of the AoE).
Once the boss is dead you can split your group. If you only have one tank they should stay on the left but ideally you will have one tank, one healer and four damage dealers in each group.
Left Route
Your progress here is controlled by the other group as they will have access to levers which open the gates blocking your route. You will meet mostly the same enemies here with two additions (see below) but many of them will keep respawning within an area until the other group have finished and unlocked the gate for you to move on.
- Gargoyles - Melee enemies who hit pretty damn hard. They have a large frontal cone attack (breath/shout) which will turn anyone caught in it to stone and an AoE ground slam attack which will do a lot of damage to anyone inside the circle around them.
- Armored Welwa - An introduction to the enemies you'll see when facing the boss on this side. They perform a rear kick attack which does moderate damage in a cone behind them.
When entering the first room, enemies will start to jump in from the left after a short time. You will have waves of smaller enemies spawning until the right group has pulled a lever to open the next gate for you; proceeding to the next room stops anymore spawns in the previous. The constant AoEs falling on the group from this point onwards is due to the catapults on the outer walls that your other group should deal with as they proceed.
Let the tank go on ahead to pick up Gargoyles which should be promptly positioned and turned away from the group. Anyone caught in the cone and turned to stone should break free and after the second cone attack beware of the ground slam attack (damage dealers and healer take a couple of steps backwards).
The third area is the boss room but you have three enemy waves to deal with before he spawns. The first two consist of all melee enemies so you can stay central, allow your tank to taunt them, turn them away from the group and burn them down together. Welwas pose no real threat but it is better if the group does not stand directly behind them to avoid their rear kick mechanic.
The last wave before the boss consists of two Flame-Shapers (at opposite sides of the room) and a pack of Welwas. Your tank should try to taunt the Flame-Shaper furthest from the entrance and run back towards the entrance (up the stairs) to stack them as close as possible. Again, other group members should watch out for interrupts in case they channel their hard-hitting ability while moving. Welwas can be taunted and will run in as they are melee but help your tank out by moving close to the stack if you have any attacking you.
Boss Two - Yokeda Rok'dun
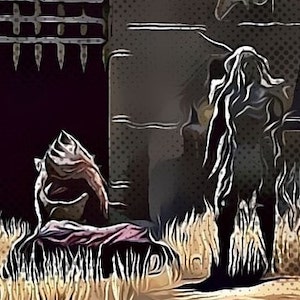
An archer that specialises in ranged attacks and controls welwa companions who aid him in battle.
- Release Flame - A flame arrow will be shot towards a group member which hits the ground and splits into four flame trails, spreading out in different directions from the point of impact.
- Reposition - The boss will run away from the tank and reposition himself in order to attack from a range position.
- Armored Welwas - Very similar to the welwas you faced previously but with an additional enrage mechanic. They will be summoned continuously throughout the fight (if the fight lasts a long time you will have many of these to deal with). After being alive for some time these will enrage, growing larger and hit a lot harder. Any welwas that die during this battle will be resurrected by the boss.
There are a couple of approaches to this fight that I would recommend depending on the groups DPS and tanks level of experience. If the group has high DPS and an experienced tank then you may wish to have your tank taunt the Welwas and keep them away from the boss while the group focuses on getting the boss down as quickly as possible. This has the advantage of not having to deal with Welwas in the group at all but puts additional pressure on the tank but with higher DPS you should not see many additional Welwas spawning so this is probably a better approach.
With lower DPS you will see many additional Welwas spawning and the tank will likely struggle to handle all of them. Here it's likely better to stack the Welwas on the boss, moving to him quickly each time he runs away, and keeping the Welwas in the groups AoE damage. If required, when a Welwa enrages your group can focus this down quickly. Bear in mind the boss will move to any dead Welwa and resurrect them so they should ideally die on the boss where possible to avoid unnecessary movement. Remember that the Welwas do a "Rear Kick" that can do a fair amount of damage when they are enraged. This strategy allows the tank to receive heals and synergys constantly from the group.
The only mechanic to watch out for is the "Release Flame" attack which will target a random group member and a fountain of flames will spawn under their feet. Get out of the fountain as quickly as possible but don't worry too much about the lines of flame that shoot out from it as these can be healed through easily. If you remain in the centre then you will take a lot more damage.
Right Route
There is only one new enemy (see below) for you to face on this side while you make your way up and along the outer walls. After each pack of enemies is defeated you will have access to a lever, which will open a gate on the other side allowing the other group to proceed further. Destroying the catapults as you go prevents additional damage being rained down on your team-mates.
- Gargoyles - Melee enemies who hit pretty damn hard. They have a large frontal cone attack (breath/shout) which will turn anyone caught in it to stone and an AoE ground slam attack which will do a lot of damage to anyone inside the circle around them.
You will need to make your way up and along the outer walls, killing the groups of enemies as you go and activating a lever in each area to open the gates for the other group. The enemies are no different until you reach the top of the stairs where you will need to kill two Gargoyles. Let the tank go on ahead to pick up Gargoyles which should be promptly positioned and turned away from the group. Anyone caught in the cone and turned to stone should break free and after the second cone attack beware of the ground slam attack (damage dealers and healer take a couple of steps backwards). Burn the catapults to stop these raining down additional damage on the other group. The area after the catapults is the boss room but you will need to deal with the final pack of enemies first, nothing new here.
Boss Two - Yokeda Kai
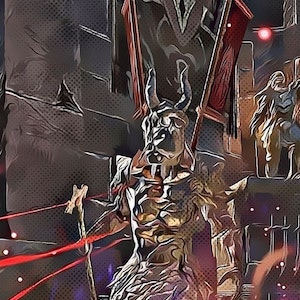
A fire mage (a superior Flame-Shaper) that specialises in all things flammable.
- Impulse - An AoE ability that forms beneath the boss' feet and does a lot of damage to anyone caught inside when it reaches its full size.
- Meteor - A huge, flaming rock is dropped on a random group member dealing a lot of damage to anyone hit. After impact, a burning AoE is left on the ground.
- Inferno - The same interruptible attack that the Flame-Shapers do; a channeled ability that shoots fireballs at random group members.
- Fiery Deception - The boss splits into four, three of which are clones of himself. Each will spawn in the same location each time and mimic the boss; performing the Impulse and Inferno ability as described above. After performing their Inferno attack they will despawn, leaving only the real boss.
This boss can get messy if the group doesn't focus on the mechanics. It's better to not stack on this fight and if you have ranged DPS in the group then they will likely take less damage staying at range.
When the boss does his "Impulse" attack you will see a spreading AoE from under his feet and you must block. If you are out of the circle in plenty of time you will not get hit but it cannot be dodged so blocking is by far the safest option.
Similarly, random group members are targeted with the "Meteor" mechanic whereby a large AoE will spawn on them which should be blocked. Many players die to these two mechanics by trying to escape the AoEs and failing.
When the boss disappears and four clones appear then the group should split up. Each clone should have one player assigned to focus on the interruptible "Inferno" mechanic. The real boss' position should be called out as soon as possible (you can tell this by looking at the health bars, three of the clones will have a solid gold coloured bar which indicates they are immune to damage). If you are assigned a clone then stay close to it, block its "Impulse" attack, interrupt it when it starts to channel the "Inferno" attack and return to your original position on the real boss. Once the clones have been interrupted they will despawn. The four versions will always spawn in the same locations but the real boss can spawn at any one of these.
Citadel Entrance
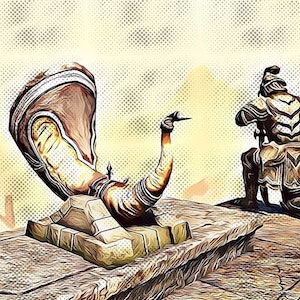
Prepare to face a collection of all of the enemies you have faced before who are guarding the entrance to the citadel. Using the horn at the back of the room will aggro all of them immediately and grants you an achievement "The War Horn" if used on veteran mode. There are a few heavy sacks and chests here and through the corridor towards the last boss.
If you are in a less experienced group it may be worth splitting the enemies and pulling a few at a time. Gargoyles should be picked up by a tank, moved and turned away from the group; these can be focussed last if you have two tanks.
These are all enemies you have faced before but the sheer number makes this pull difficult. Focus priority targets such as Flame-Shapers and Destroyers and make sure the Flame-Shapers are interrupted.
If you use the war horn for the achievement then you can use the pillar (to the left as you are facing down the stairs) to somewhat position the enemies. One tank can move in and taunt the Gargoyles to keep them to one side while the rest of the group stack behind the pillar. The other tank can manipulate the enemies as they run to the group to turn the Destroyers away and group everything as best as they can.
Final Boss - The Warrior
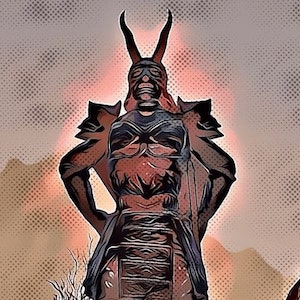
Despite being one of the oldest, this is still one of the hardest hitting bosses in the game. The Warrior puts a lot of pressure on the tank, requires full group coordination and a fair bit of effort from your healers to complete it. There are two large circles, to the left and right of the boss as you enter the room; the left increases health recovery and the right increases damage done for anyone standing inside (including the enemies). These are generated by the statues on their respective side which will be destroyed one by one during the fight (left at 85%, right at 70%). The boss will also destroy any chests and remaining adds around the room at 35% when he does his Shehai Storm mechanic so be sure to loot these before you start the fight (sticking to the outer walls will ensure you do not aggro the boss).
- Channeled Swipes - A series of heavy slashes that each do a lot of damage to whoever has aggro and to anyone standing close enough in front of him.
- Shield Throw - The boss will target a random member of the group, turn to them and throw out his shield like a boomerang. The shield will hit for a lot of damage and knock down anyone not blocking; it hits on the way out and on the return.
- Leap - The boss leaps to any group member that is far enough away from him and does a lot of damage on impact. This mechanic only happens if someone is standing far away, however. He will sometimes leap to the statues when he destroys them or leap back from the statues once they have been destroyed.
- Cleave - A front-facing, conal, cleave attack which does a lot of damage. Towards execute this will be done after each shield throw and typically will be in the direction that he threw his shield.
- Shehai Storm - The boss points his sword upwards and channels an attack that hits everyone in the group. Each group member will get a pulsing red circle under their feet that moves with them and does damage with every pulse. Overlapping with another group members circle will cause you to take damage from their AoE as well.
- Adds - Destroyers and Flame-shapers are summoned at different times during the fight. These act exactly as described previously and will be destroyed at 35% when the boss triggers the initial explosion of his Shehai Storm mechanic (Shehai Shockwave).
Hardmode
Activated by destroying all three of the statues found outside the door to the final boss room and cannot be undone; once activated you will need to kill the boss on hardmode or die trying. As with almost every other hardmode in the game, expect the boss to have more health and some of the above attacks to do more damage.
- Stone Form - A random group member will become encased in stone and unable to use any abilities. While encased they will receive a unique synergy "Destructive Outbreak", which releases them from the stone but also does huge damage in a large circle around them.
- Gargoyles - In the area around the boss there are twelve statues, each containing a Gargoyle. The statues will start to come to life during the fight giving your group additional enemies to deal with. They work exactly the same as described previously.
Non-Hardmode
The main tank should keep the boss in the position he spawns in and turned away from the group. If you want to benefit from the statues damage buff then you can move him closer to the blue circle and the group can stack behind him inside this circle. The main tank will likely need to shield through the "Channeled Swipes" mechanic but healers should pay attention to this and provide support where needed.
The group should stay close to the boss to avoid him jumping away. He will jump to anyone positioned too far from him (always jumping to the furthest player away). When he does his "Shield Throw" mechanic a rectangular AoE will be shown that you can simply step out of. If you are too slow make sure you are blocking or you will get knocked down and take a lot of damage. The tank can block this without any issues.
The off tank should get ready for enemies to spawn in. The waves will alternate between two Destroyers and two Flame-Shapers. The Destroyers should be positioned on the boss and turned away from the group and the main tank; if required these can be focussed down but ideally they are positioned close enough to not take damage away from the boss. The Flame-Shapers can only be positioned by out-ranging their attacks to have them run to the boss. They are not easy to deal with but if they can be positioned on the boss it'll make things a lot easier. These should be focussed as a top priority and it helps to have one member of the group with a ranged interrupt assigned to these to stop their "Inferno" ability.
At 35% the boss will put his sword up in the air and channel an attack. After a few seconds there is an explosion which will destroy any remaining enemies in the room. The easiest way to deal with the execute phase is for the group to spread out slightly (you can stand anywhere except close to the front of the boss as he does cleave with his attacks). When the boss next channels an attack with his sword up (and each time hereafter) each group member will have a pulsing AoE under their feet which does a lot of damage. Barriers are helpful here but damage dealers should also block and cast a shield/heal when required. It helps to position in such a way that each healer takes care of "their" side primarily as when spreading out your ground based abilities will not reach everyone. If you stand in another group members AoE you will take damage from this one also (and they will take damage from yours), this will likely kill both of you! Beware that if you move too far from the boss in order to position during this phase he will start to jump around once he has finished channeling, re-position closer to him.
The boss will begin to do an additional cleave attack during execute after each "Shield Throw". This is not always in the direction of the tank and hits incredibly hard so be sure to back away a little and watch for the boss to swing his sword before moving back in.
Hardmode Changes
The twelve Gargoyle statues positioned around the room will start to come alive and should be destroyed before this where possible. The best approach to this is to have the main tank position the boss in front of and facing a statue while the rest of the group stands at range but in a straight line behind the tank to ensure the boss' "Shield Throw" mechanic always collides with the statue; this will destroy the statue and prevent it from coming alive later on. Due to the placements of the statues you can always hit two with each "Shield Throw" providing the group stays in a straight line or stacked properly (an example order and positioning shown below). If one group member steps out of line and the mechanic targets them then you can miss the statues completely or, more often, miss one statue. Any Gargoyles that do come to life should be moved out of the group, turned away and killed as quickly as possible.
Tip: This mechanic can be avoided completely by having the off tank deal solely with the Gargoyles and having your group focus on the boss. For score pushing this is obviously the way to go but it can take a lot of the fun away from the fight. Click here for a great explanation of how to accomplish this and a demonstration of it in action.
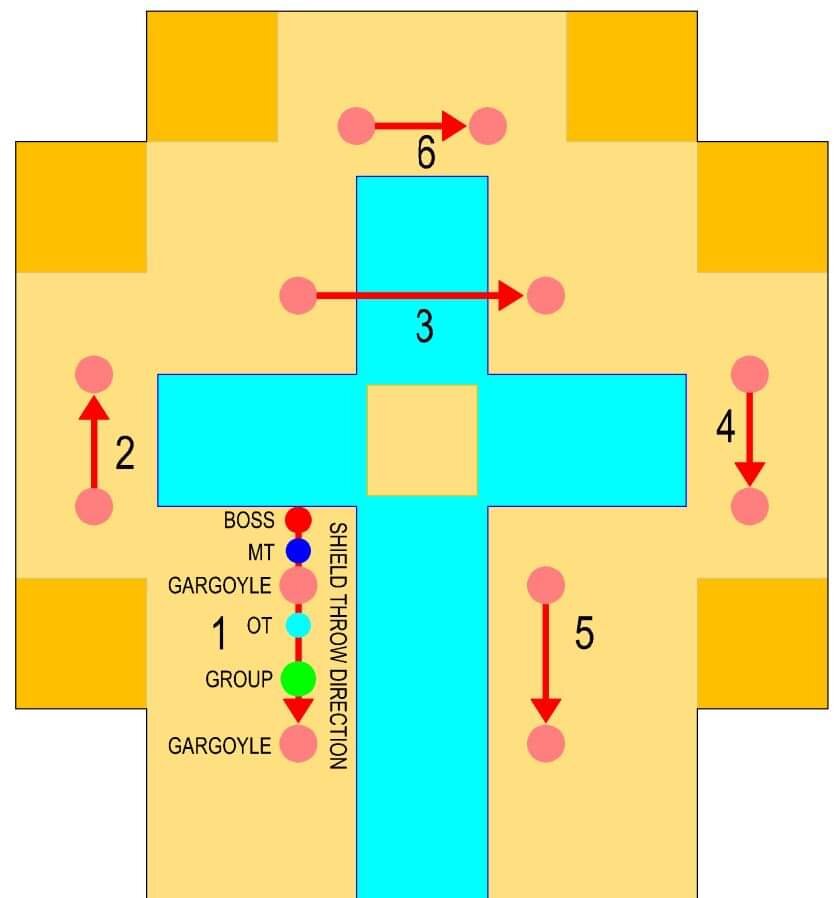
Notice how the group and both tanks will all be positioned along a straight line to dictate the direction of the boss' "Shield Throw" through the Gargoyles (indicated by the red arrows).
The numbers indicate in which order the group moves to each position (it does not matter on the order really but this would ideally be decided ahead of time). The main tank should always be moving the shortest distance to position the boss as quickly as possible and this is why the shield throw direction differs. You may wish to move the group behind the Gargoyle in positions 2, 4 and 6 as the Gargoyles here are quite close together.
A random group member will get turned to stone and unable to use abilities. If this is on someone in the stack they should avoid pressing the synergy and wait for the next "Shield Throw" mechanic as this will break them free. If this is on the main tank then they should call "Breaking out in 3..2..1" and press the synergy allowing any group members that are closer to back away. The main tank needs to break free to deal with the boss but everybody else can wait to be released.
The additional enemies still spawn in but the off tank needs to try to stay within the straight line as described above as much as possible. It's a massive advantage here for your damage dealers to be ranged to allow the group to stack a little away from the boss giving the off tank room to bring the adds in between the main tank and the group without causing issues to either. It makes sense to turn the Destroyers to the side so that they cannot hit the main tank or the group (if you are caught in the cone attack simply block it to avoid being knocked out of position) and have your ranged DPS focus the Flame-Shapers.
During execute the "Stone Form" mechanic is ongoing so you have two options for dealing with this, the first probably being the easiest but relies on good communication:
- Have your group spread out slightly as to handle the AoEs but when a group member is turned to stone they call their side and countdown to using the synergy (e.g. "Breaking free RIGHT 3..2..1"). This allows anyone on the right to move away quickly so that the player can safely break free. Everyone should return to their positions as soon as it is safe to do so.
- Rather than spreading out immediately, stay stacked to ensure whoever is turned to stone is released by the "Shield Throw" automatically. If the main tank keeps getting the "Shield Throw" and multiple group members are getting turned to stone and unable to release then you can make a call to spread out and all break free at the same time (i.e. someone counts down); once released, stack up again (this is very unlikely to happen but technically could occur). When the "Shehai Storm" mechanic occurs the group can spread out (it helps massively to determine who goes where beforehand!) and return to a neat stack when it ends.
